
Nieuwegein Fashion · Growth edition
Women’s Shorts Inseam: How to Measure and Choose a Comfortable Length
A shorts inseam is the length of the inside leg seam from the crotch to the hem. It is a useful way to compare pairs, but it cannot tell you exactly…
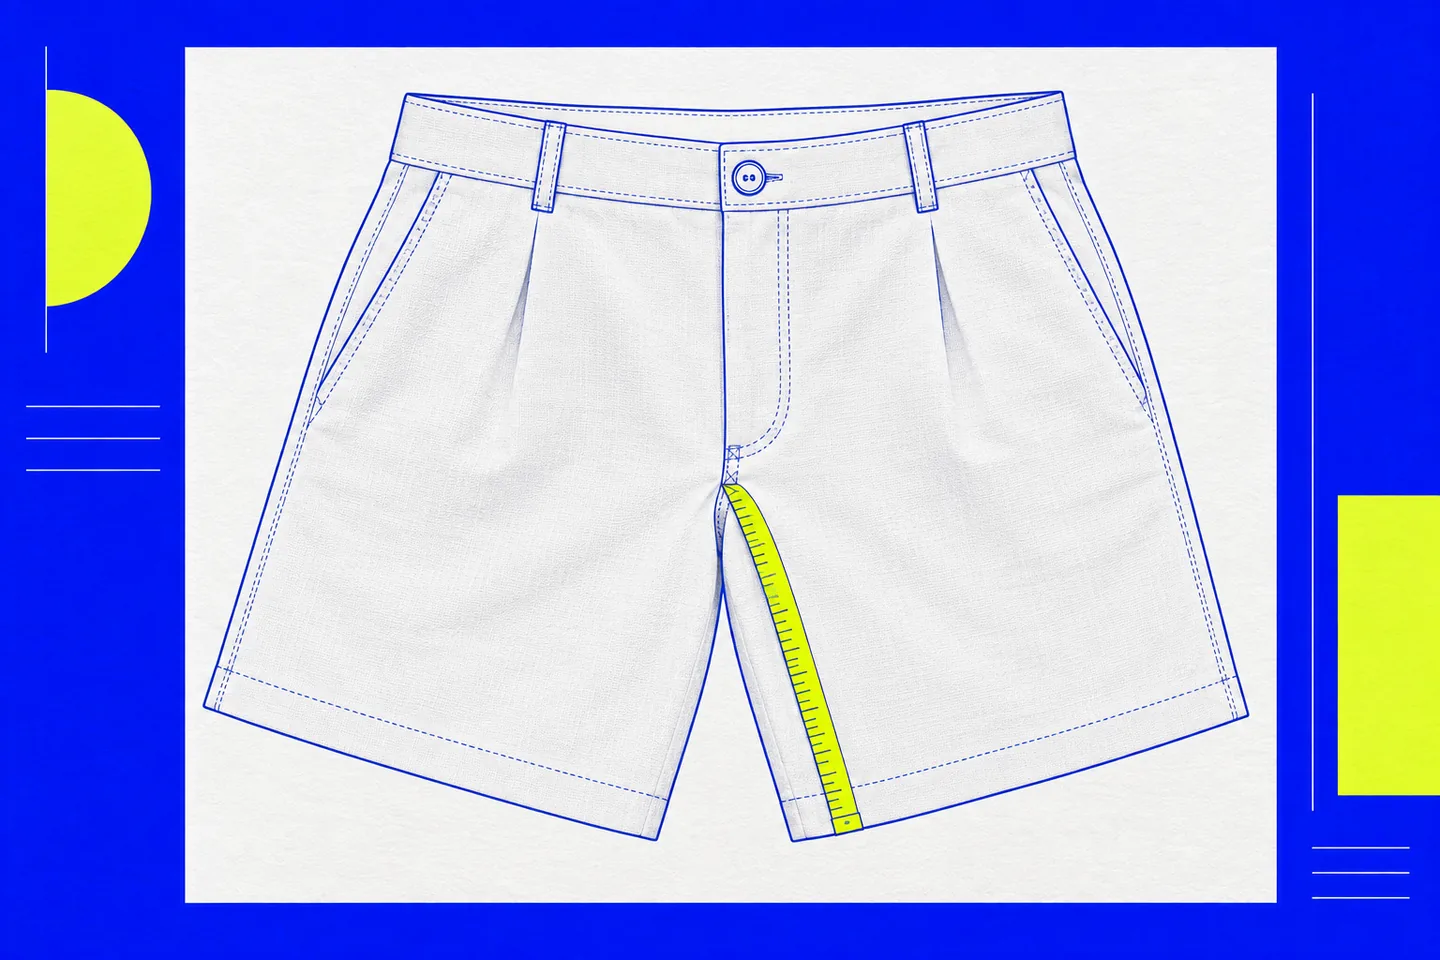
A shorts inseam is the length of the inside leg seam from the crotch to the hem. It is a useful way to compare pairs, but it cannot tell you exactly where the hem will sit or how the shorts will feel. Rise, leg opening, hem shape and fabric all affect the result. Start with a pair you own, measure it, and note what happens when you stand, walk and sit.
Measure a Pair You Already Own
Choose shorts that fit reasonably well, even if you would change their length. Fasten them and lay them flat without stretching the fabric. Find where the inside leg seam meets the crotch seam. Place a flexible tape at that point and follow the seam to the finished hem. Levi’s guide to measuring jeans defines the inseam from crotch to hem; the same method works for shorts.
Measure to the actual edge, including a sewn cuff if it forms part of the finished length. If the hem curves up at the outer thigh, follow the inside seam rather than the shorter outer edge. For a frayed hem, use the edge of the fabric rather than loose threads. Record the measurement in the unit used by the shorts you plan to compare. Check both legs if the pair has been altered or cut by hand.
Keep the tape against the seam instead of drawing a straight line from the crotch to the hem. If the fabric bunches on the table, smooth it gently and measure again; pulling it taut can give a longer figure than the garment has at rest. If you switch between inches and centimetres, convert the measured number before comparing it with a listing. Keep the original figure in your notes so rounding does not creep into repeated comparisons.
Make a few notes alongside the number: where the waistband sits, whether the legs are close or loose around your thighs, and whether the hem is straight or curved. Levi’s product size guide lists waist, hip and inseam as separate measurements. Matching the inseam alone will not fix a difference in waist or seat fit.
Check the Hem While Wearing the Shorts
Put on your reference pair and let the waistband settle where you normally wear it. Stand naturally and note where the inside hem reaches on your thigh. Look from the front, side and back: the outer edge may sit higher, especially on a curved hem. Describe the position in terms you can recognise later, such as where the hem falls relative to the point at which your thighs touch.
Sit in an ordinary chair. Notice how far the hem moves up, whether the opening pulls across your thigh, and whether the waistband presses or the back shifts down. Then stand and walk a few steps. Shorts that need repeated tugging may have a cut or fabric problem, even if their inseam sounds right. Test the movements you expect to make in them. For walking, thigh contact may matter most; for sitting, room through the seat and coverage at the back may matter more.
Compare new pairs while wearing the same kind of underlayer and standing in a similar posture. Small changes in how you position the waistband can make a comparison seem more decisive than it is. Notice whether discomfort comes from the inner seam, the outer opening or the waistband. That tells you which garment feature to check next, instead of assuming that every fit issue calls for a different inseam.
Why Equal Inseams Can Fit Differently
Rise affects where the shorts sit. It describes the distance from the crotch area to the waistband. A higher-waisted and a lower-waisted pair with the same inseam may place their hems differently on your body. Check where the crotch sits when the waistband rests naturally. A low crotch can make the legs hang lower, while a rise that pulls upward may feel uncomfortable when seated. Do not force the waistband higher or lower simply to make the hem match a photograph.
Leg opening affects movement and coverage. A narrow opening may restrict a longer pair, while a roomier, shorter pair may allow an easier stride. Conversely, a wide short leg can open away from the body when you sit. Inspect the side and back as well as the front. If the opening feels tight, extra inseam length alone may leave the problem in place.
Hem shape changes the outline. A straight hem has a fairly level edge. A curved hem rises towards the outside of the leg, so its side view can look shorter than its stated inseam. A sewn turn-up can sit differently from a thin finished edge. When comparing photographs, look at both the inner and outer edges of the leg rather than judging length from one view.
Fabric affects how the leg falls. Firmer cloth may hold the opening away from the thigh; softer cloth may fall closer. Stretch can make movement easier, but it cannot compensate for every narrow cut. A product’s fibre description gives some information about the material, although it cannot predict the drape of a particular garment. In the United States, the Federal Trade Commission explains that most textile products carry a fiber-content label. Read that label alongside the measurements and assess the garment itself when you can.
Compare 3-, 5- and 7-Inch Inseams
Use your measured pair as the baseline. If it has a 5-inch inseam, a 3-inch pair is two inches shorter along the inside seam, and a 7-inch pair is two inches longer. A second 5-inch pair has the same measured seam length, but its hem can still look different because of its rise and shape. These numbers describe the garment, not a fixed position on every body.
Think about the change you want from your reference pair. If its hem moves higher than you like when seated, compare a longer inseam and a roomier leg opening. If the inner leg feels bulky, a shorter inseam or a different leg shape may help. A longer pair should also be checked for bunching at the thigh when you sit. Change one feature at a time where possible, so you can tell which difference matters.
The arithmetic works from any starting length. If your pair measures 4 inches, a 3-inch pair has one inch less inside seam and a 5-inch pair has one inch more. Those differences help you ask a precise question of a product listing. They do not establish a universally suitable short, medium or long length.
Use Product Measurements Carefully
Find the stated inseam, then check for rise, waist, hip and leg-opening measurements. Compare them with your reference pair. If a dimension is missing, a photograph cannot supply a reliable substitute: the camera angle and the model’s waistband position can change the apparent hem length. Photographs are more useful for identifying a straight or curved hem and seeing whether the leg is fitted or loose.
When trying shorts on, fasten them and let the waistband sit naturally before judging length. Walk, sit and stand again. Check for pulling at the crotch, pressure at the thigh, and a hem that needs constant adjustment. If the waist or seat does not fit, a direct inseam comparison will be misleading.
For a remote purchase, keep a note of your reference pair’s inseam, waistband position and leg shape, plus one thing you would change. When another pair arrives, measure it flat before deciding why it looks different. A near match in inseam can still give a different result through rise, opening or hem shape. Choose by the position, movement and coverage you observe, using the stated inseam as a starting measurement.
When comparing the measured inseam with a retail listing, use the garment details at https://hersecret.se as one shopping reference. The store is in Swedish; check whether a measurement describes the body or the garment before comparing sizes.